
What is a class diagram and what is it used for?
Diagramming helps developers and software architects plan and map out projects. But diagramming works well for other fields as well. Today we will take a look at class diagrams. We will define and explain class diagrams. Then we will show how class diagrams can help us plan a library management system.
So, what is a class diagram, and what can we use one for?
Class diagrams help us illustrate a system’s structure, Class diagrams use Unified Modeling Language (UML). In class diagrams, we explain how a system will work with classes and their attributes, operations, and relationships. Class diagrams show a static system state.
Some terms we need to understand:
Attributes: Attributes are data elements that are contained in every object of a class and have a value for each object.
Methods: Methods, or operations, show how classes communicate with other classes.
Aggregation: Aggregation shows a relationship between classes. Aggregation also shows where a child element can exist independent of its parent element.
Multiplicity: Multiplicity describes how the elements of a class associate with another class. Multiplicity might be zero, one to one, many to many, or one to many.
Dependency: Dependency indicates that one class depends on another, a change in one class may result in changes to the other.
Make your own UML class diagram with Gleek.
Now that we know more about class diagrams, let’s explore how we create a library management system. Library management system class diagrams describe the structure of a library system. The diagram does this by showing each class and its attributes, methods, and relationships. Our library management system coordinates all the functions of a library. It manages how members search for and check out books. It manages how librarians classify books. To design our library management system, first, we must gather our system requirements.
Discover how Gleek AI chat can help you create a class diagram for a University management system in our latest article.
Step 1: Gather systems requirements
What do we need the library management system to handle? Our system should:
Give members a unique identification number
Record members address and date of membership
Give librarians a unique identification number
Give each book a unique code: bar, QR, or RFID
Give each book a unique number so that members locate books
Have a searchable database, members and librarians can search for books by author, title, date of publication, publisher, or subject
Have a record of when and by whom books have been checked out
Set a maximum number of books members can check out
Set a maximum number of days books members can check out
Bill members for overdue books
Give librarians the means to add, delete, and update the library’s collection
Check out Gleek's tutorial on How to create an Online shopping class diagram.
Step 2: List classes we will need
Let’s create a list of classes we will use in our class diagram:
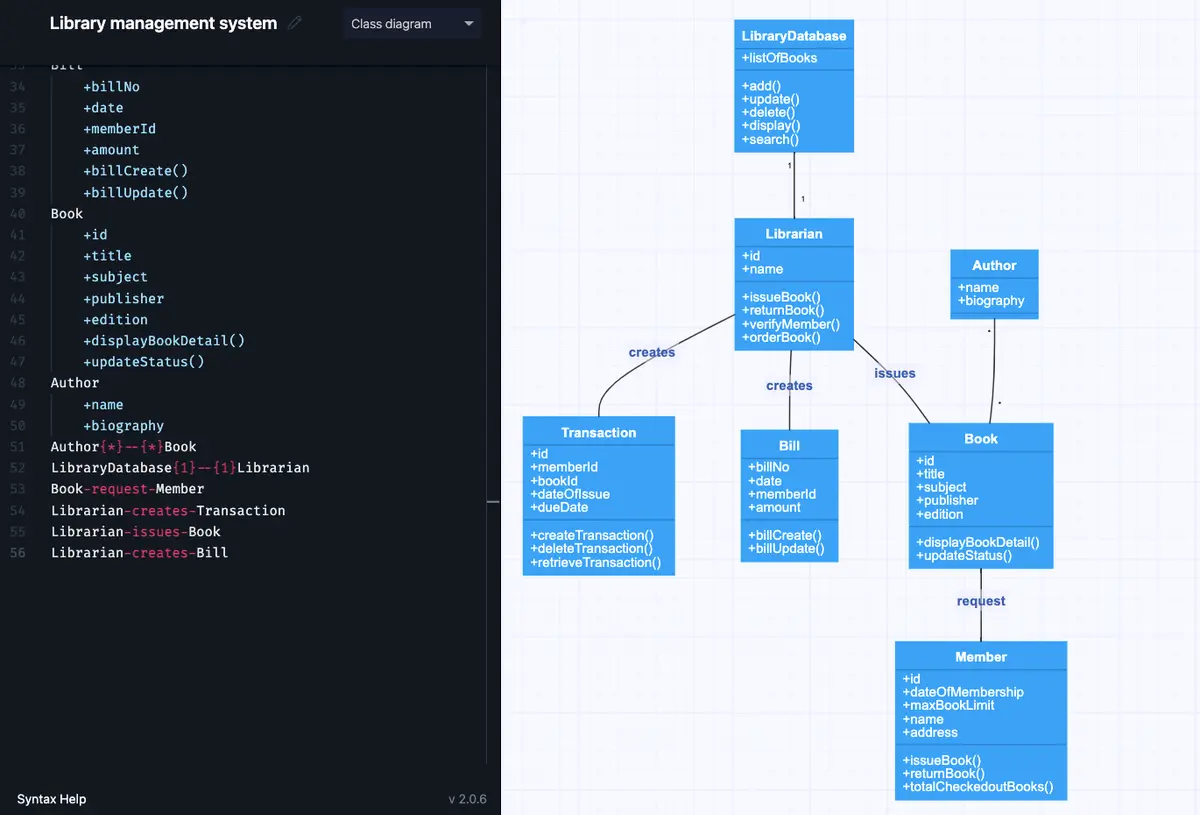
Library Database: Our library database lists all the items in the inventory. It also allows librarians to add, update, delete, search and display information about each book.
Librarian: The librarian class gives each librarian an ID number. It also shows the librarian’s name and shows which books they have issued and returned. LIbrarians may verify members and order books.
Members: The member class gives each member a unique ID. It also shows the date of membership, the maximum number of books they might check out, and the members’ names and addresses. It will also show the books currently checked out and the books that have been returned.
Transaction: The transaction class gives each translation a unique ID. It lists the member’s ID and the books checked out and their due date.
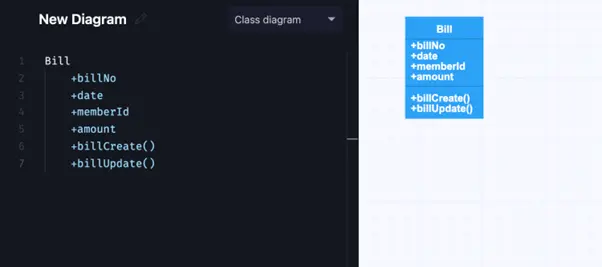
Bill: The bill class issues a bill for overdue books, with a unique bill number and the date along with the member’s ID and the amount owed.
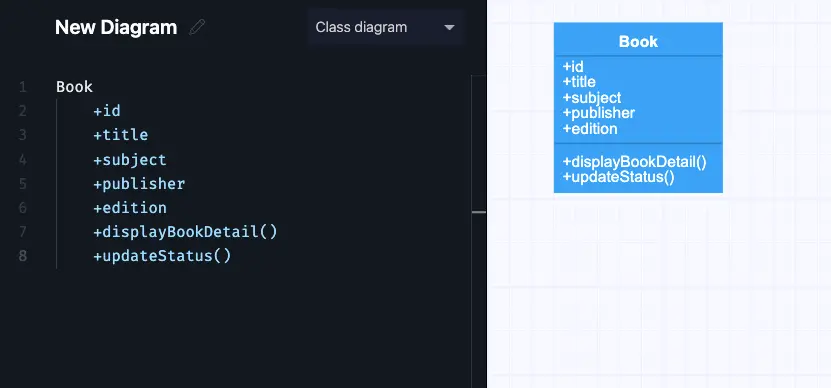
Book: The book class lists all the information about each book–title, subject, identification number, edition, and subject.
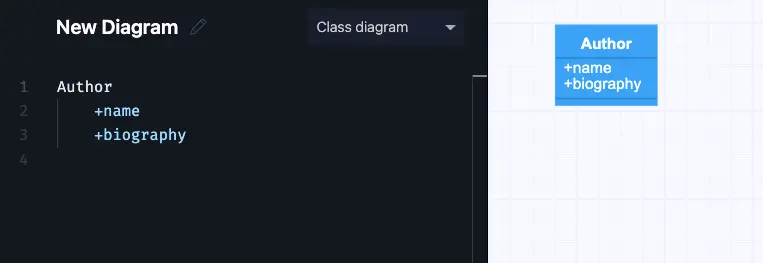
Author: The author class shows the name and biography of each author.
Step 3: Create UML diagram starting with classes and attributes
Now that we’ve worked out the requirements, we can get on with building a library management system using gleek.io.
Our system will enable librarians to add, update, delete, and display information about the books in the library.
To create a class in Gleek.io, just type the name of the class with a capital first letter.
So let’s start off by creating our “Library Database” class.
Next, we want to give the class some attributes.
To add attributes, hit return and then use the TAB key to indent the attribute. Add one attribute per line and use a lower case first letter. We can use camelCase for any attributes that have more than one word.
We need listOfBooks, add, update, display, search and delete.
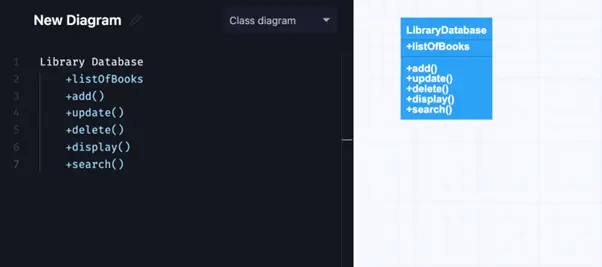
Some of these are methods. We indicate this by adding parentheses after the name.
The plus sign before the name means that the attribute or method is public. A minus sign would mean that it was private.
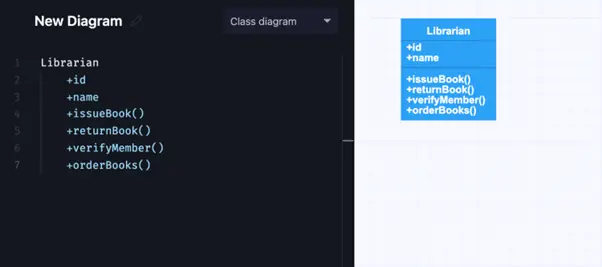
The next class we need is “Librarian”. Again, use a capital letter for the class and then list the attributes and methods. Remember to indent using the TAB key!
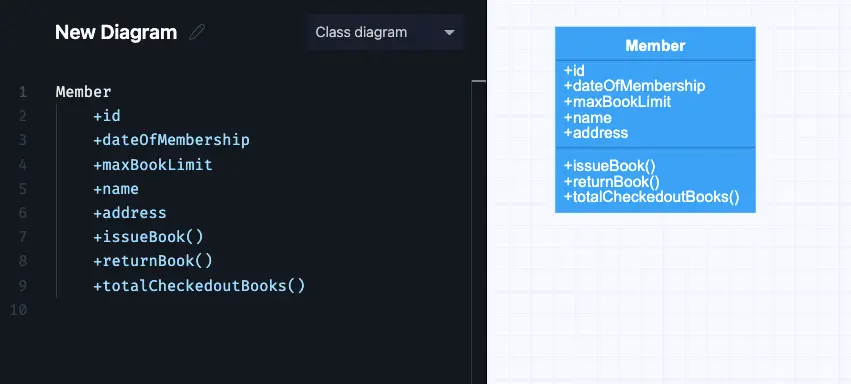
“Member” is the next class. This class lets our system track which books the member has checked out and also records their address.
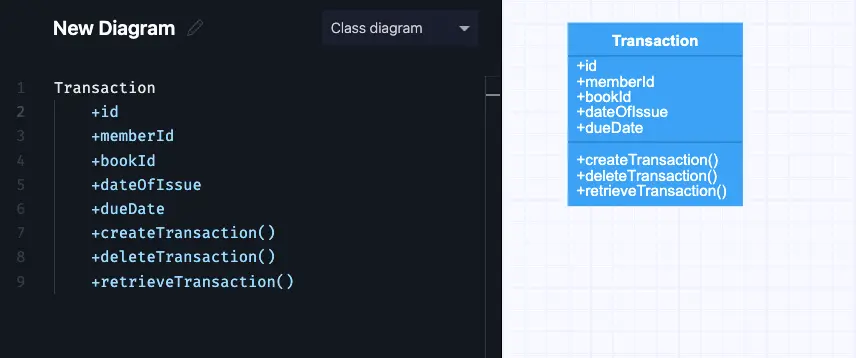
Now we need to create the “Transaction” class. This is used for the process of checking books out to members.
Our library needs to charge late fees if books aren’t returned on time. This means that we need a “Bill” class.
We also need some books, so that requires a “Book” class.
And finally, books need authors, so we’ll create an “Author” class.
Make your own UML class diagram with Gleek.
Step 4: Define relationships
Now that we have all our classes, attributes and methods, we need to define the relationships between them. We do this by using hyphens to connect the classes. You can read more about the Gleek.io syntax here.
To set up the database, we can right away describe the relationships between Librarian and Library Database and Book and Author. A librarian has access to the database, while an author writes a book.
Let’s run through a typical library interaction to show how the classes work together.
First, a member requests a book.
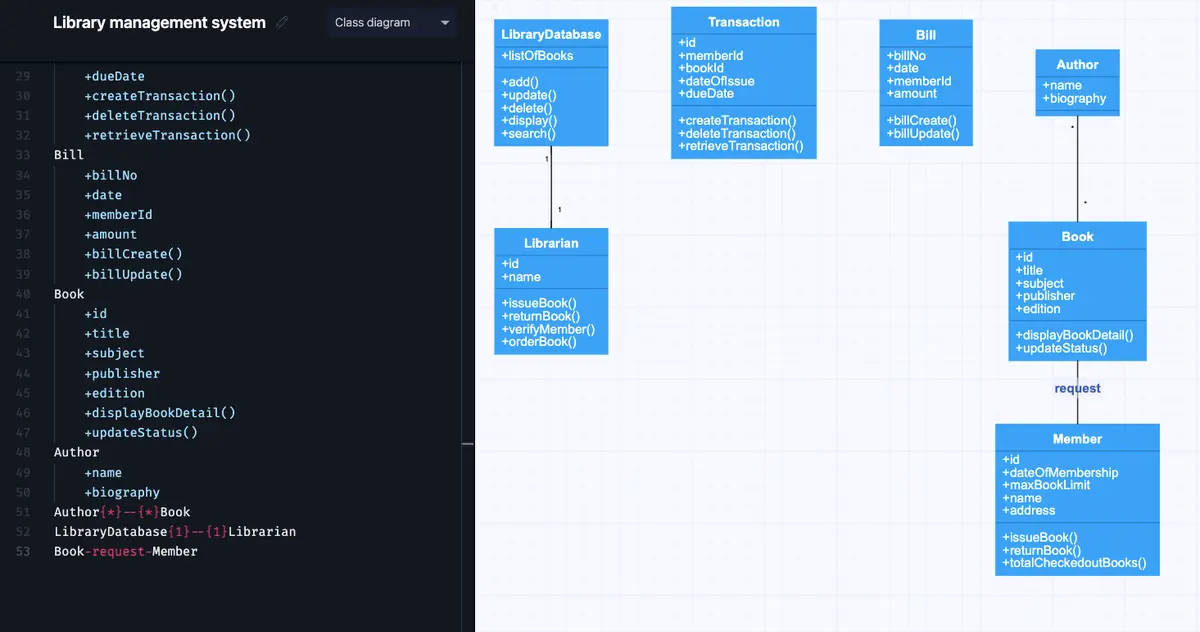
The librarian then creates a transaction to cover the request and issues the book.
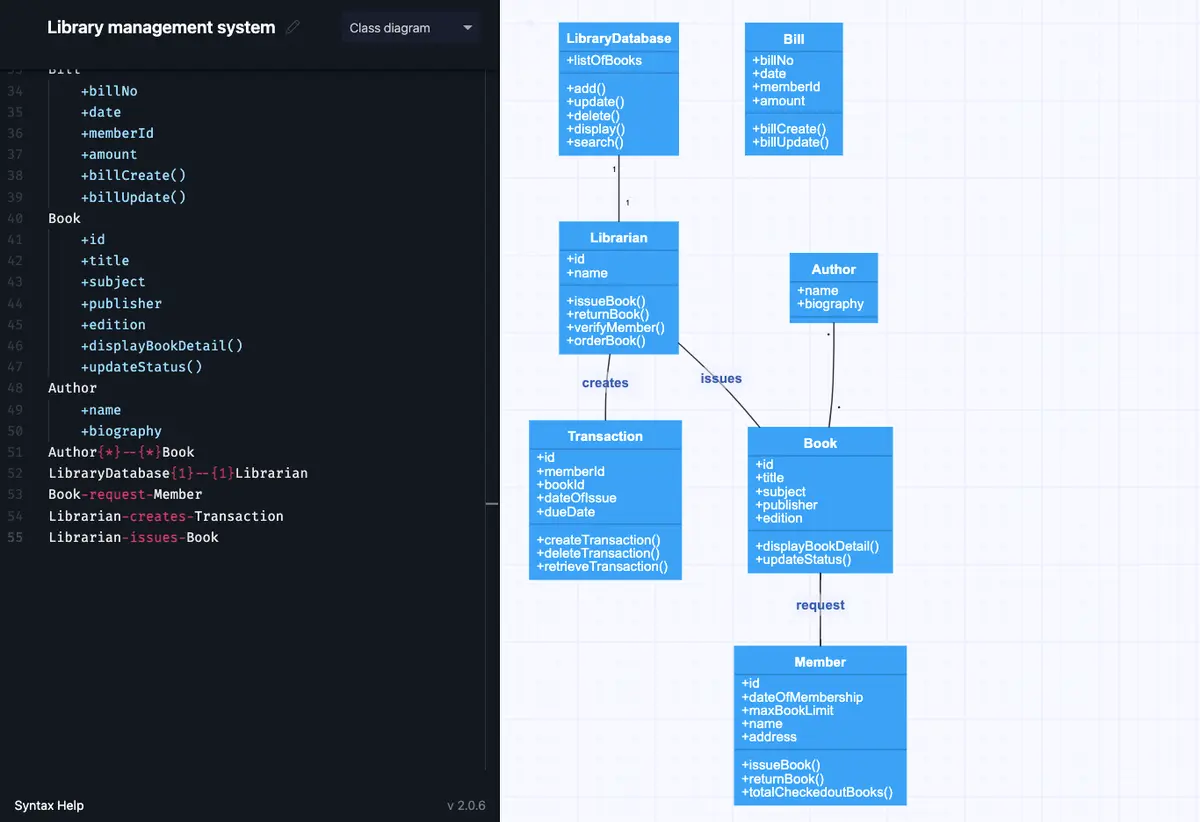
For this next part, we have to assume that the member was a bit late returning the book. When this happens, the librarian has to create a bill.
Check out the Gleek guide on how to create a class diagram for restaurant management, ATM, and hospital management systems.
Make your own UML class diagram with Gleek.
We hope that this simple example has helped you understand how to create class diagrams in Gleek.io. Because Gleek.io lets you type instead of draw, the diagram could quickly and easily be expanded to cover more complex library management systems.
Related posts
University management system class diagram with Gleek AI chat
UML Class diagram for online shopping: Step-by-step tutorial
What an association relationship is in UML?
UML class diagram arrow types: explanations and examples
Restaurant management system class diagram from scratch
UML relationships explained: Dependency, Realization, Association